Watching a full video on Git can feel like a tough task, and it’s not always the most productive way to learn. That’s why I’m writing this blog, to save you time and help you focus on the core concepts.
Caution: This guide covers 80% of what you’ll need in your daily use of Git. If you’re already familiar with >the basics and want to dive into more advanced topics, this might not be the blog for you.
Note: Before diving into Git, think about how you would create a system that:
- Stores your code or files efficiently.
- Tracks which files are saved and which aren’t.
- Allows you to go back to a previous version of a file, make changes, and merge those changes into the current version.
You might have thought of a folder system(Please at least think for a minute😅), saving different versions of a project in different folders. But this can become tedious and space-consuming. Now that you have a solid understanding of the problem, let’s dive into Git.
Introduction to Git
Git is a version control system (VCS) that stores different versions of your project at various points in time. Each version represents how your code or file was at a specific moment. For example:
Version 1:
// written something
Version 2:
// written something
// written something else
Git tracks these different versions. Although Git is much more powerful, we’ll start with the essentials.
Setting Up Git Config
Open your terminal and type the following commands to set up Git with your information:
git config --global user.name "Your Name"
git config --global user.email "your.email@example.com"
git config --global core.editor "code --wait"
For Windows users:
git config core.autocrlf true
For MacOS/Linux users:
git config core.autocrlf input
Core.autocrlf ensures compatibility between operating systems. Windows uses CRLF (Carriage Return + Line Feed) for end-of-line markers, while MacOS/Linux uses LF (Line Feed). These commands help Git manage line endings properly across different OS.
Installing and Initializing Git
You can install Git from the official Git website, depending on your operating system.
Once installed, initialize Git in your project directory by running:
git init
This command creates a hidden .git subdirectory in your project, where Git stores all snapshots and project history.
Git Workflow

When your project reaches a point where you want to save it, you “commit” the changes, which is like taking a snapshot of your project at that point in time. Before committing, Git uses a staging area to prepare what should be included in the snapshot. In this we propose or put what we want to commit.
Example Workflow:
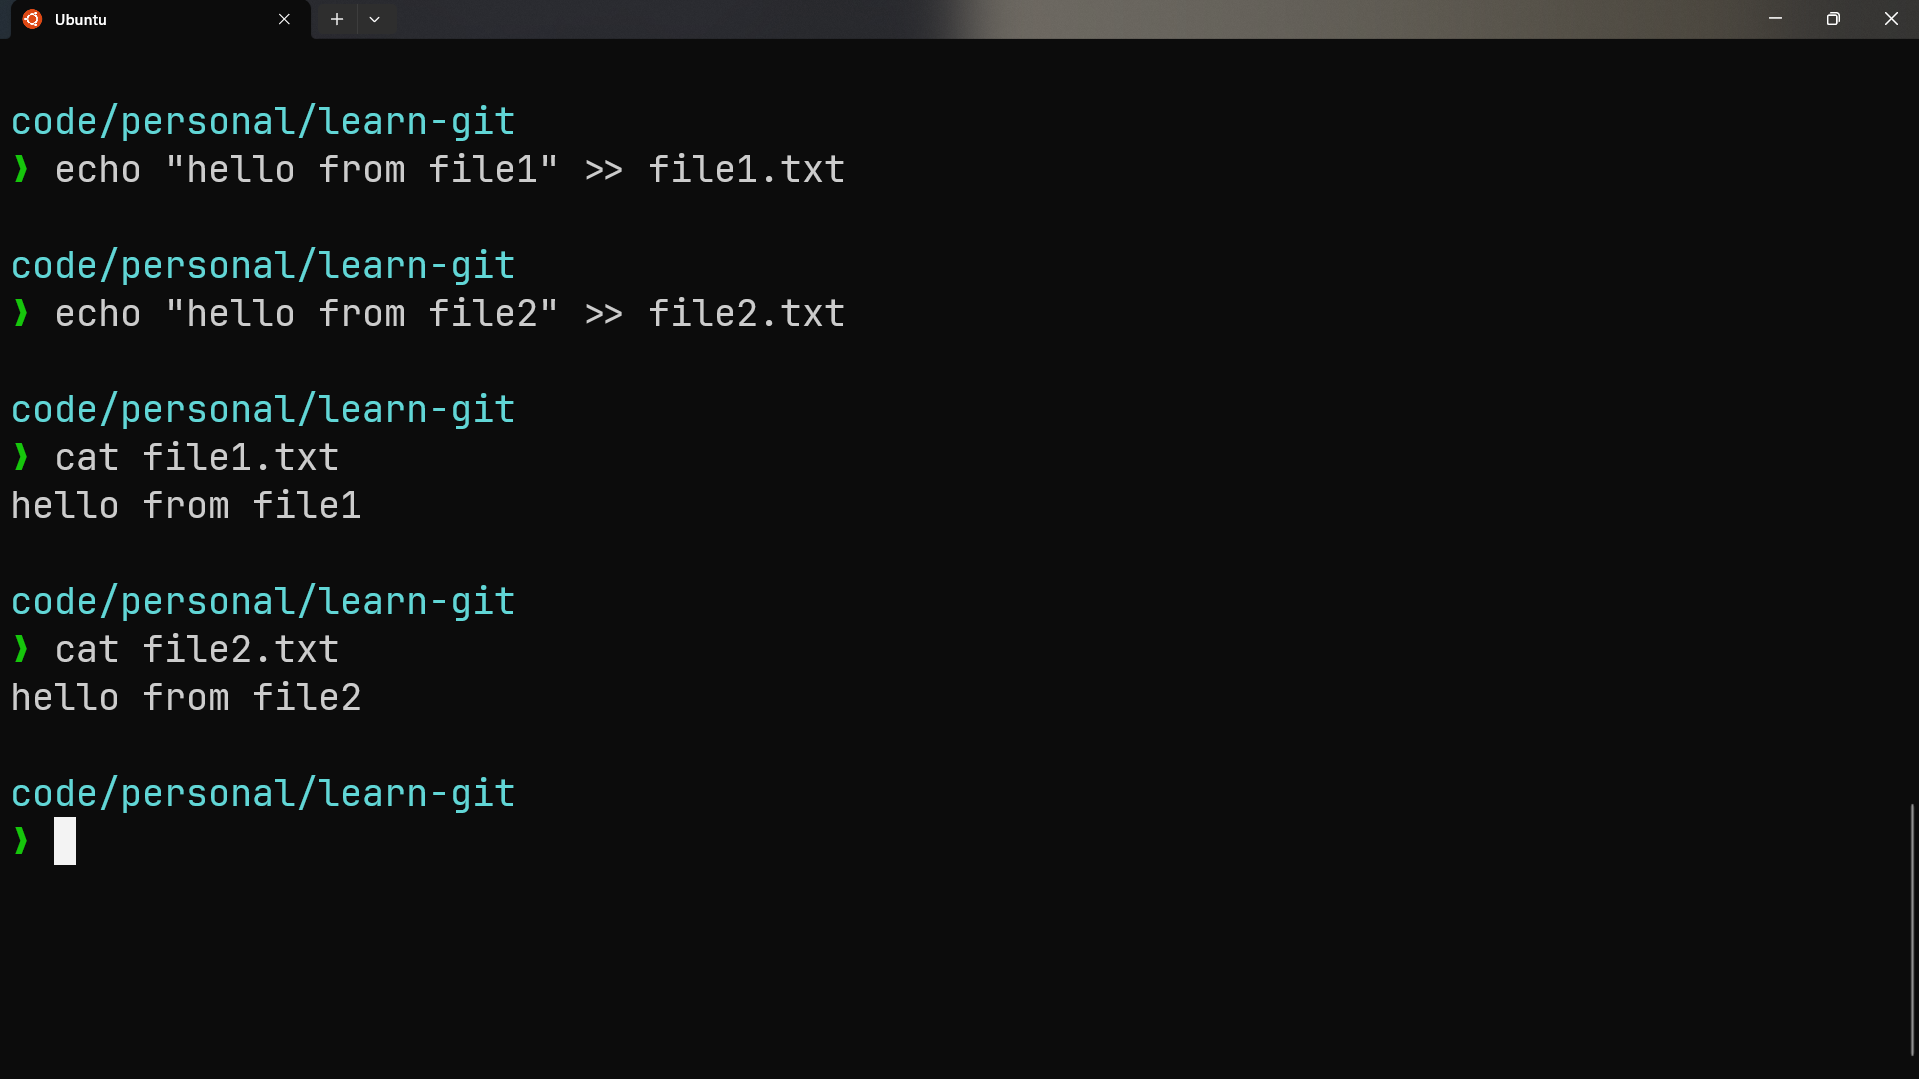
Create two files in a folder of your choice.
Initialize Git in the project directory:
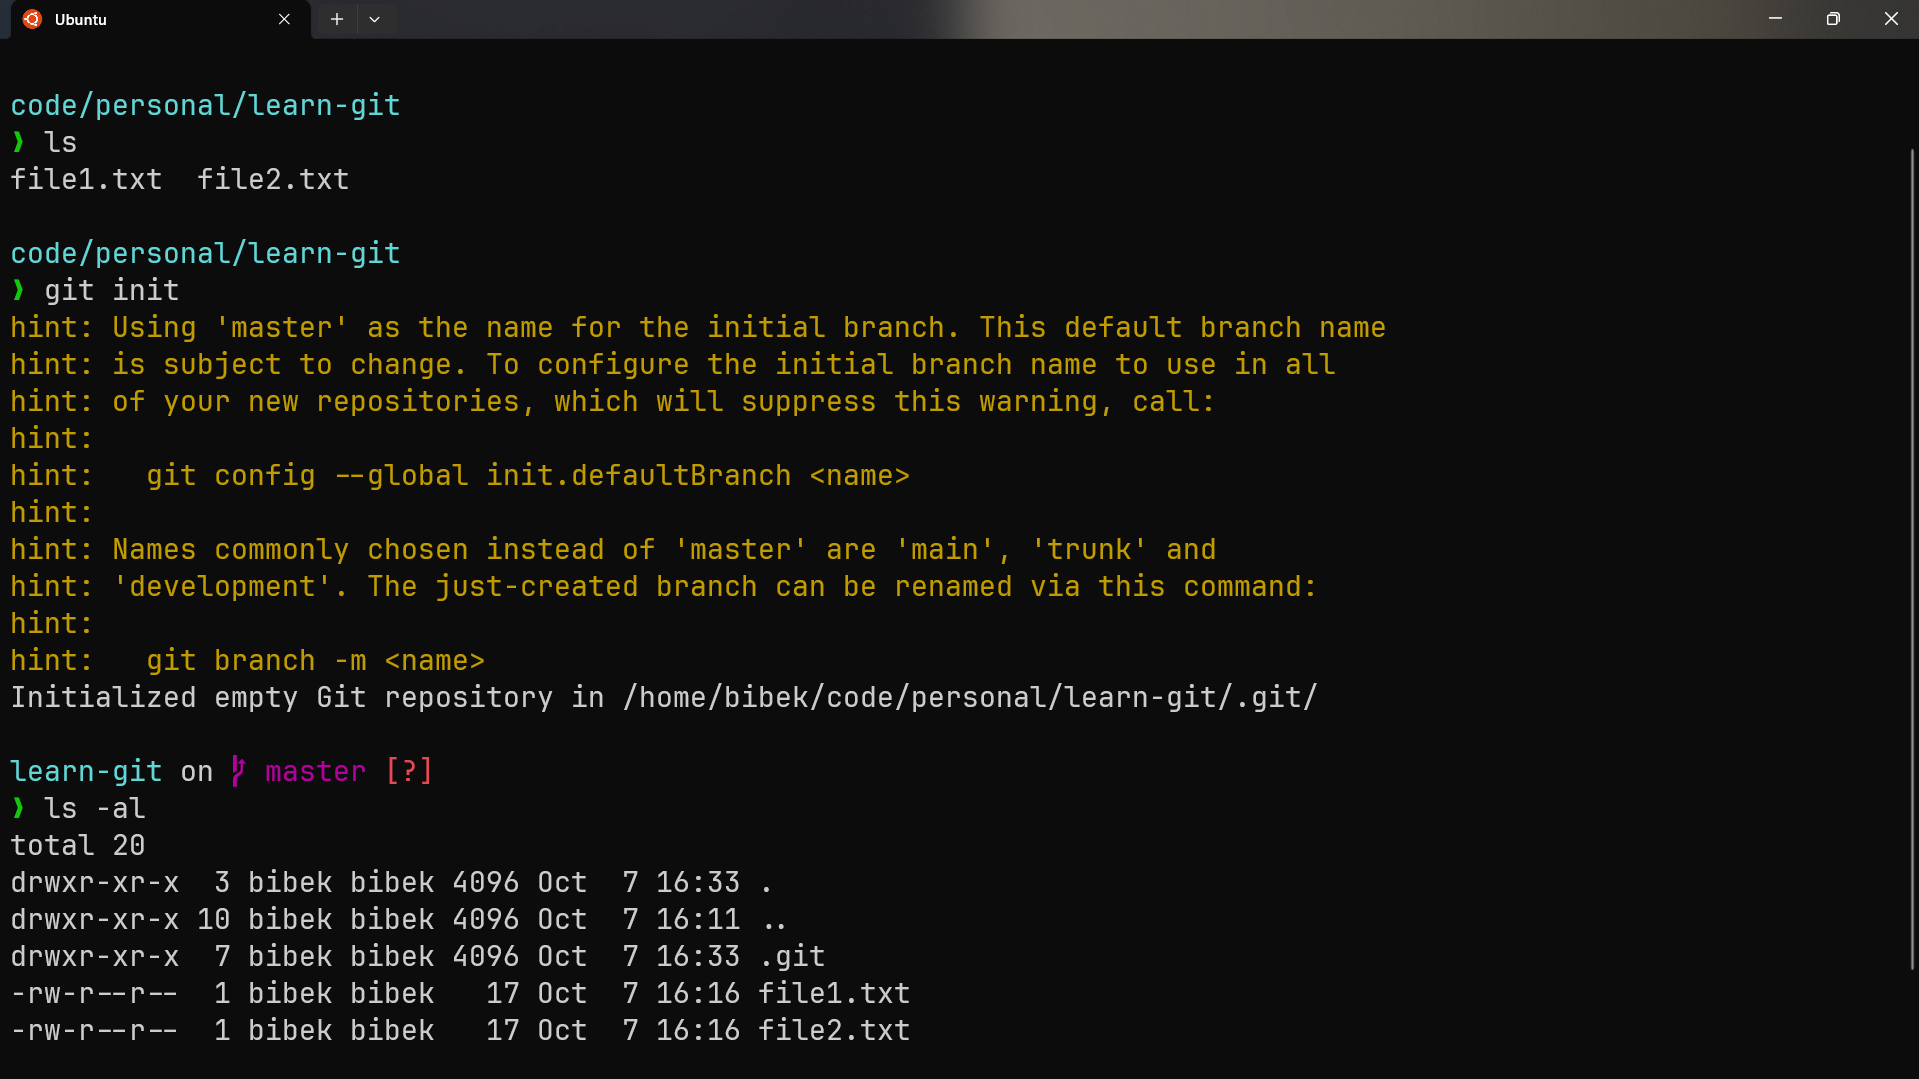
git init
It creates a hidden folder named .git which contains all the snapshots and your configuration for the project. You can view it using the following command in linux/macos:
ls -al
ls -Force  /*and for windows you can do this:/*
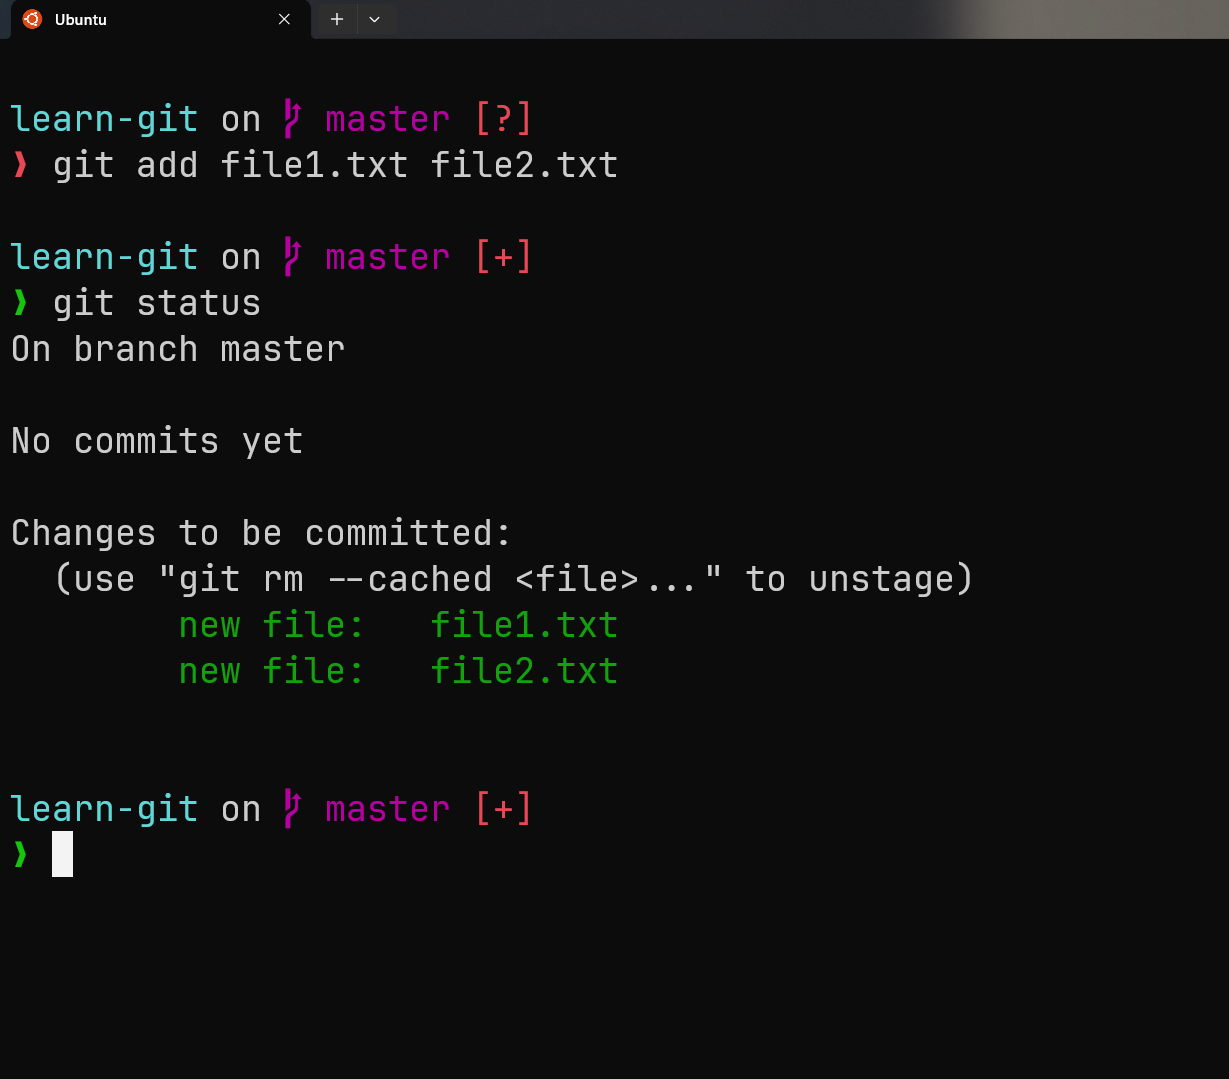
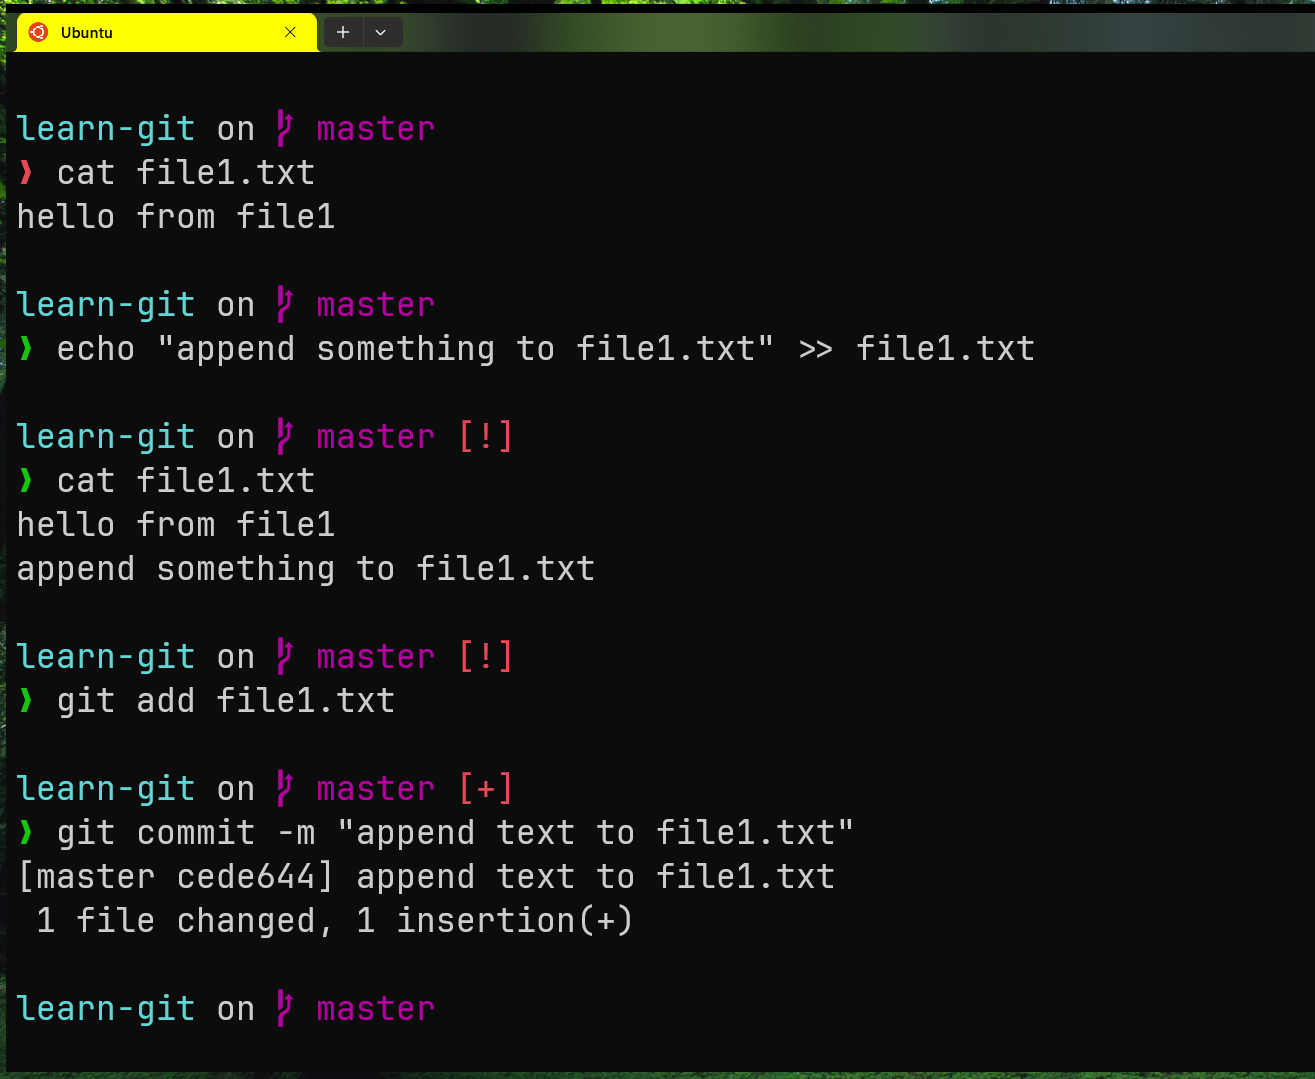
Add files to the staging area:
git add file1.txt file2.txt
Check the status(current state of your project) of your project:
git status
Commit your changes with a message:
git commit
It will open your default text editor(vscode(what I use), vim, neovim or any other according to your configuration). Here, you can type your commit message:
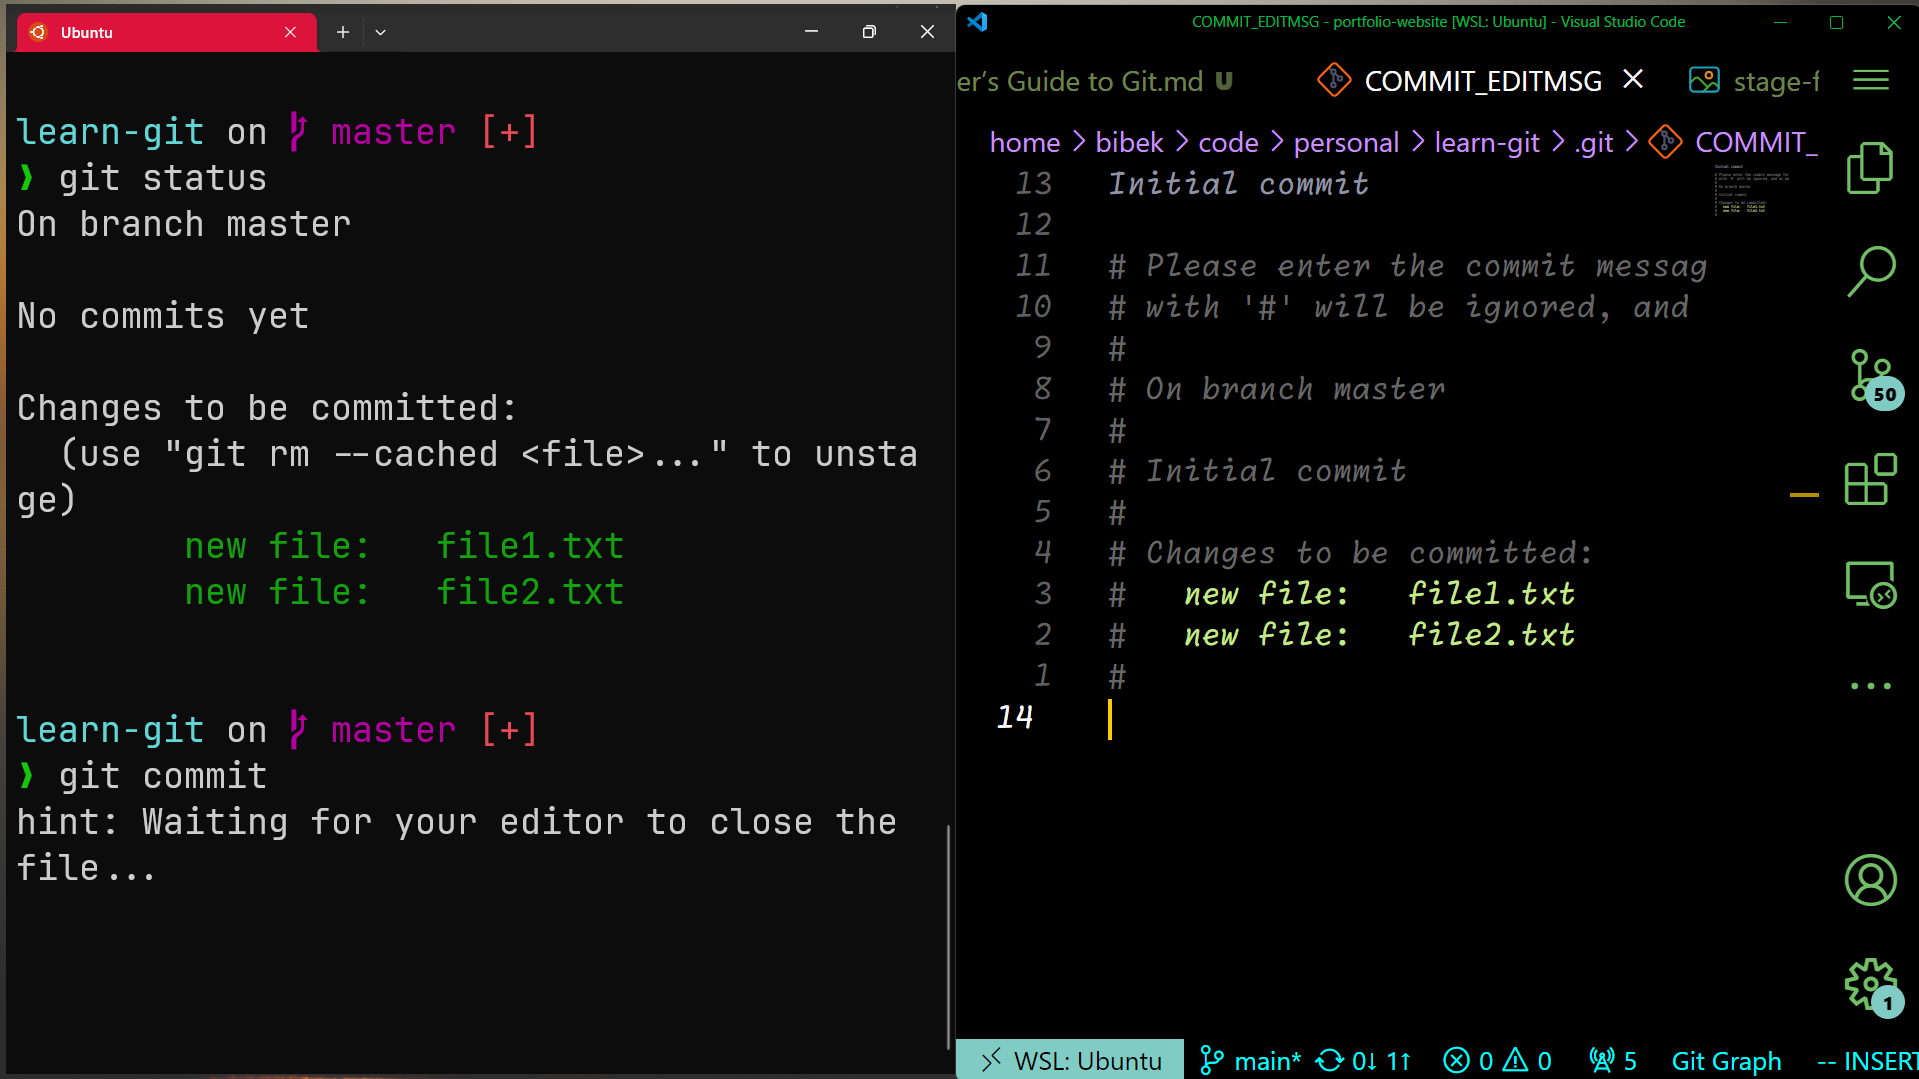
- The first line should be a short summary of the changes (ideally 50 characters or less).
- Leave a blank line after the summary, then provide a more detailed description if necessary.
Commit guidelines/ best practices:
- Not too short not too large but meaningful and represent the state of the code/project at that point.
- Not too often and not frequently(after some minor file updates). As you reach a state you want to record then you commit.
- Each commit should represent a logically separate change set.
- Usually present tense is used in commit messages { fix the bug than fixed the bug}
You can also create commit directly using following command(do this only if you are sure of what you are commiting):
git commit -m "Initial commit"
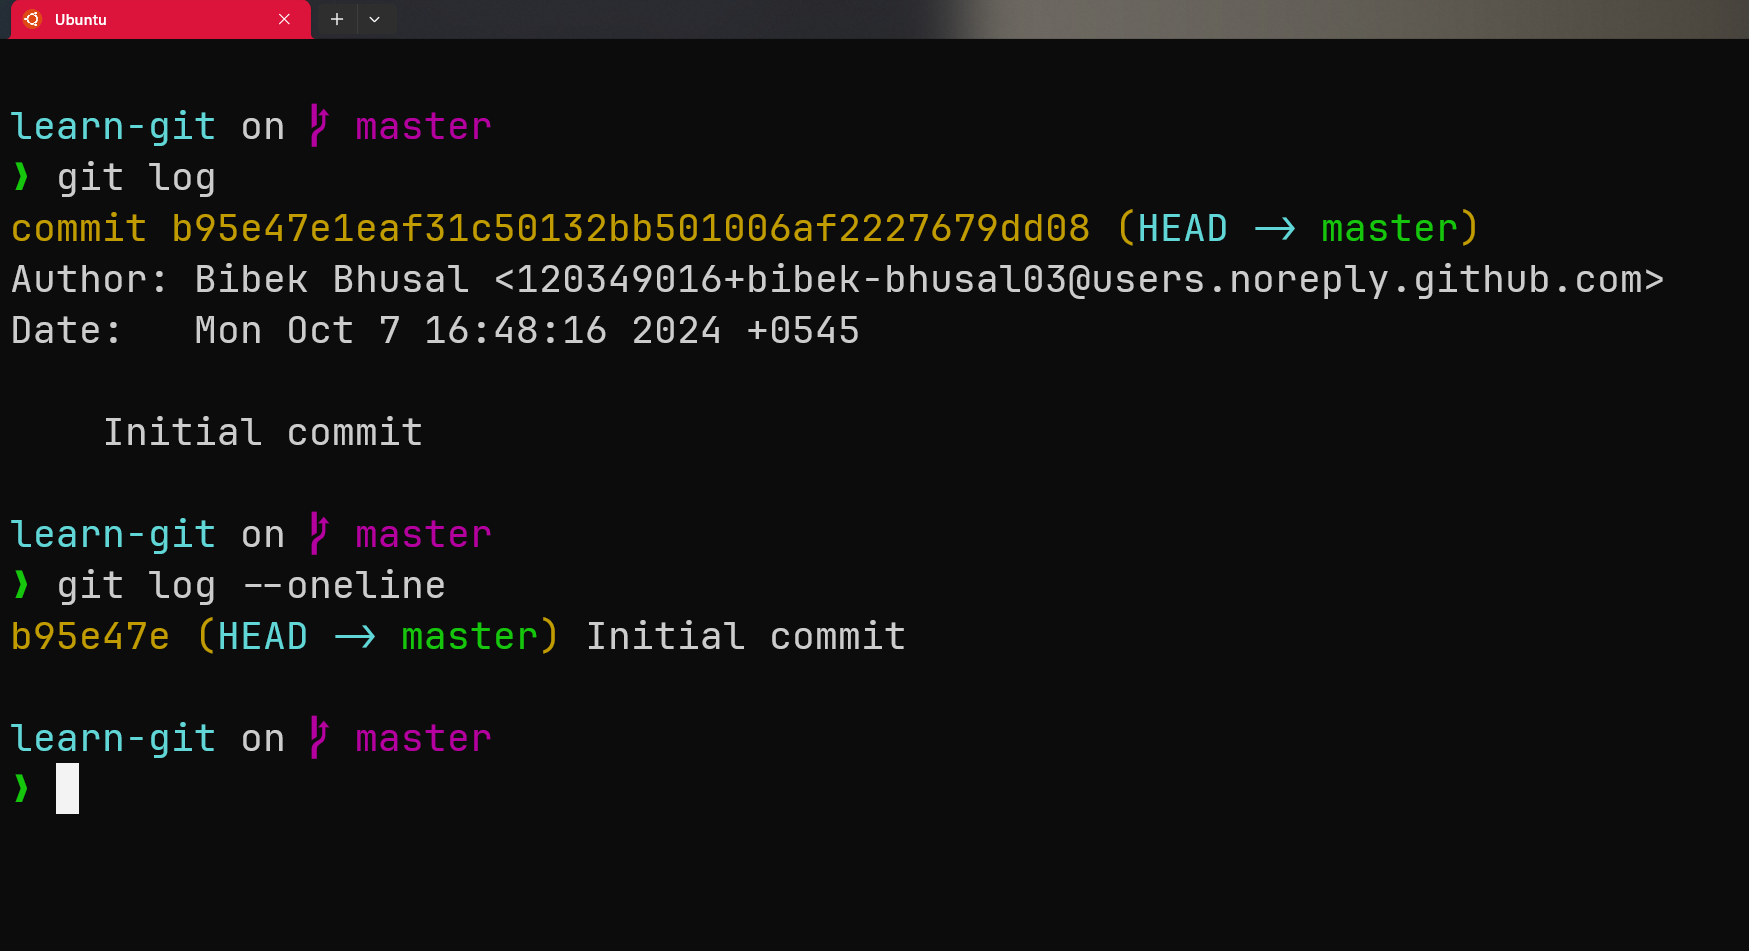
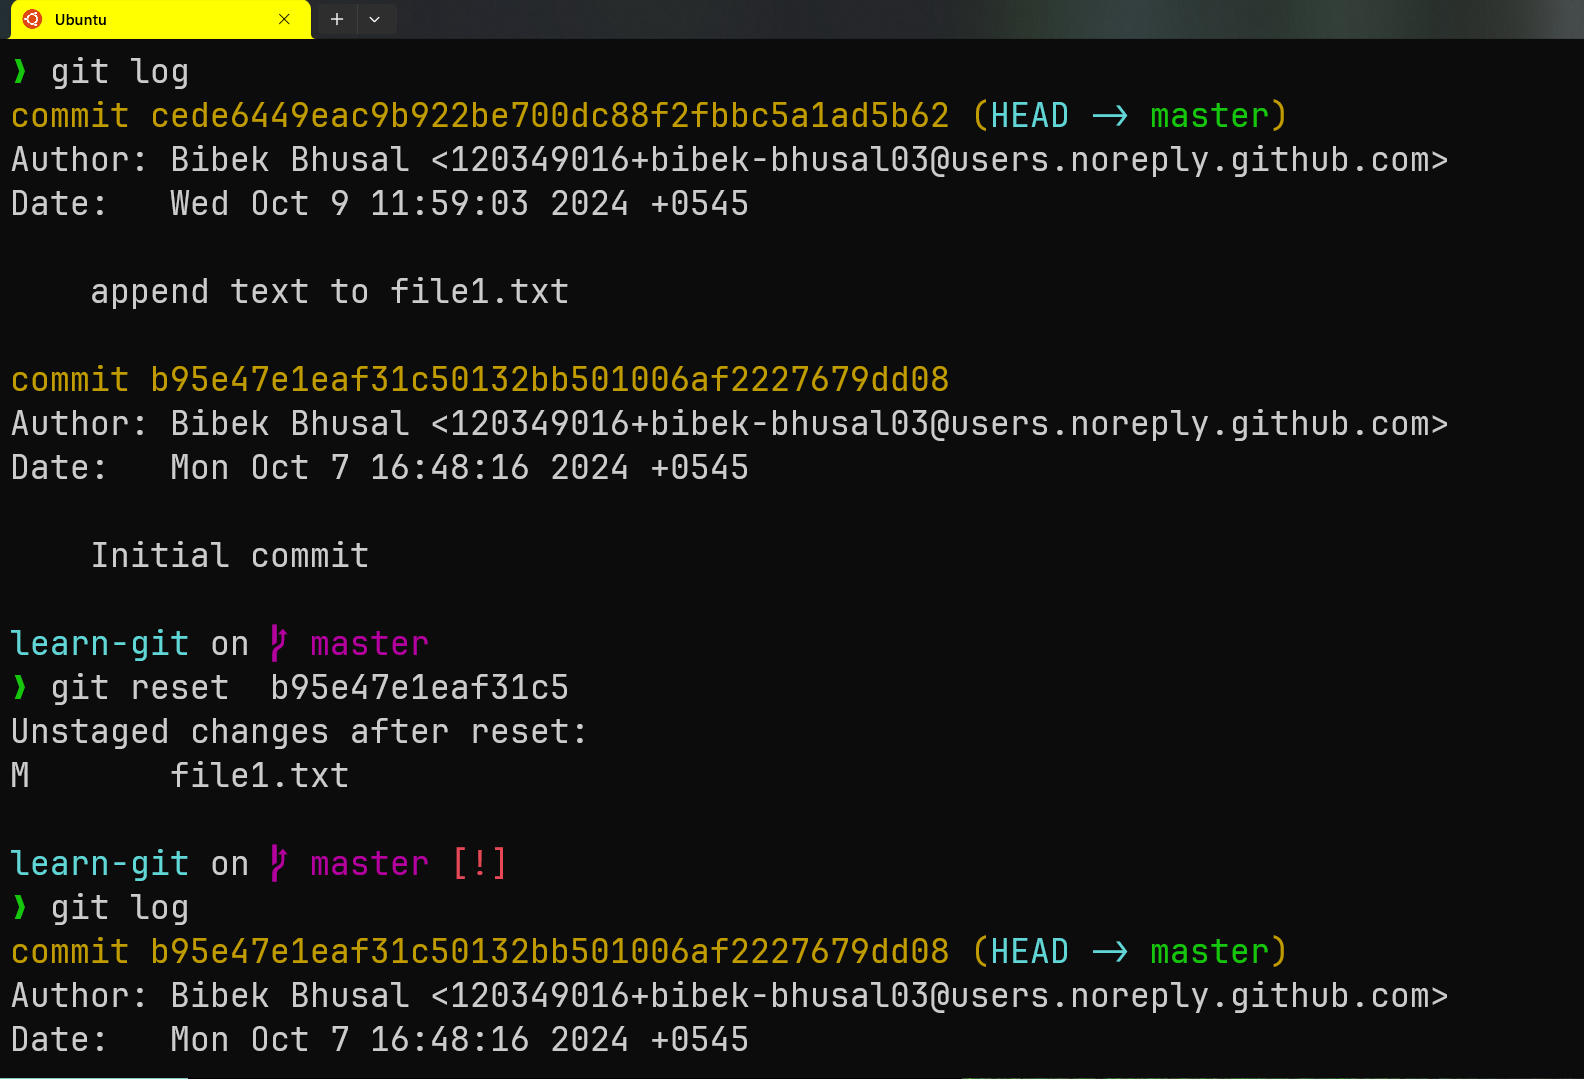
You can view the commit history:
git log

git log --oneline /* this shows shorter(oneline) version of commit */
Useful Git Commands
Here are some key Git commands to help you get started:
To explore other commands first of all let’s write something to file1.txt:
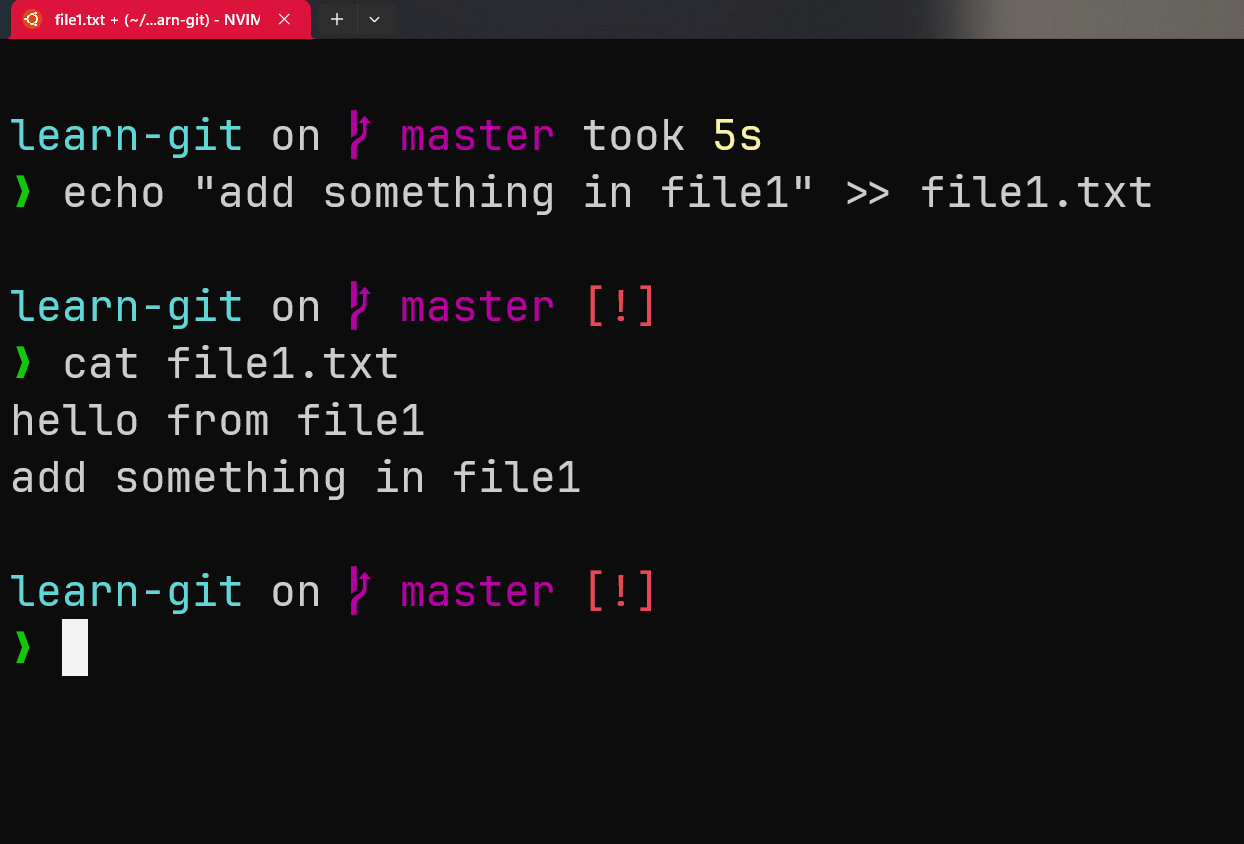
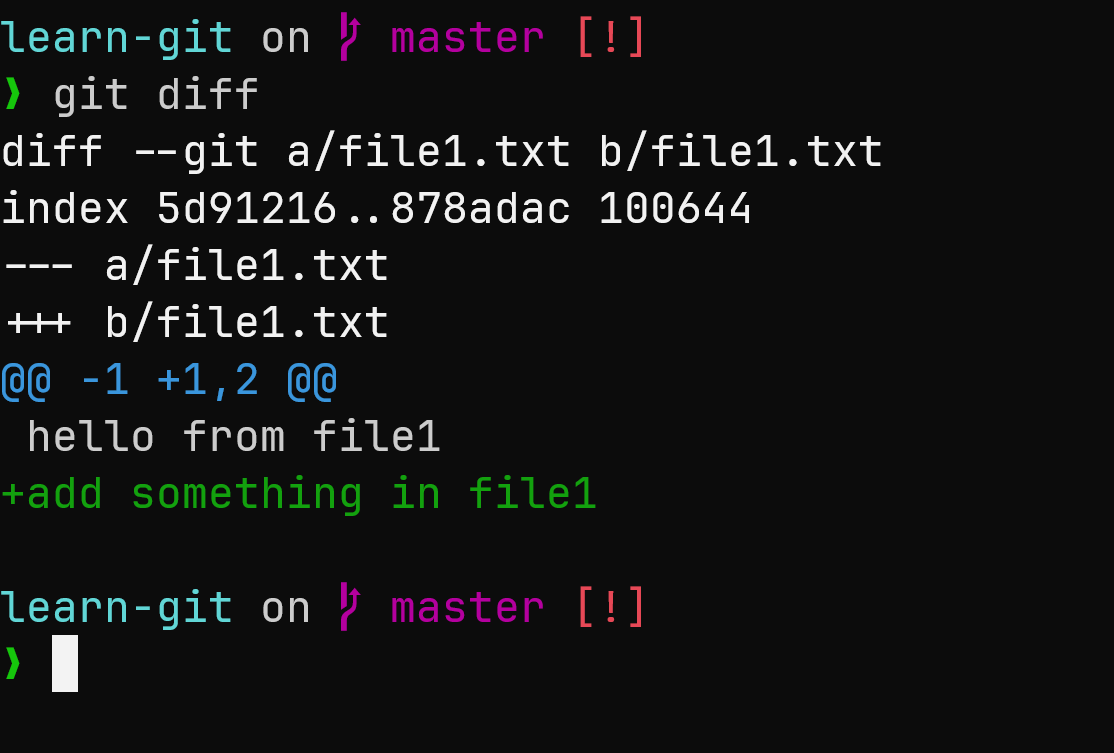
git diff
It shows the changes in your working directory that are not yet staged. It means you have changed some file but you haven’t added them in staging area.
Here’s whats happening here:
-
The git diff output shows that you have added a new line to file1.txt that says
add something in file1, in addition to the existing line hello from file1. -
The + sign highlights what has been added, while lines without a + or - represent unchanged lines in the file.
In-Depth-Info:
diff --git a/file1.txt b/file1.txt: This line indicates that the diff is for the file file1.txt. The prefixes a/ and b/ are used to >denote the “before” and “after” states of the file, respectively. index5d91216..878adac 100644:This line shows the index (or blob) hashes of the file before and after the change. 5d91216 is the > hash of the version of the file in the last commit, and 878adac is the hash of the current version > in >your working directory. 100644 is the file mode (indicating it’s a regular file).
--- a/file1.txt: This line indicates the version of the file before the change (the last committed version).+++ b/file1.txt: This line indicates the version of the file after the change (the current version in your working >directory).@@ -1 +1,2 @@: This is a “hunk header” that tells you where the changes are located in the file. the -1 indicates that the change starts at line 1 in the previous version of the file, and the +1,2 > indicates that it starts at line 1 in the new version and includes 2 lines.hello from file1: This line represents content that is unchanged and is present in both versions of the file.+add something in file1: The + sign indicates a new line that has been added in the current version of the file. This means ?> that the line add something in file1 is newly included in file1.txt compared to the last commit.
View changes in the staging area:
git diff --staged
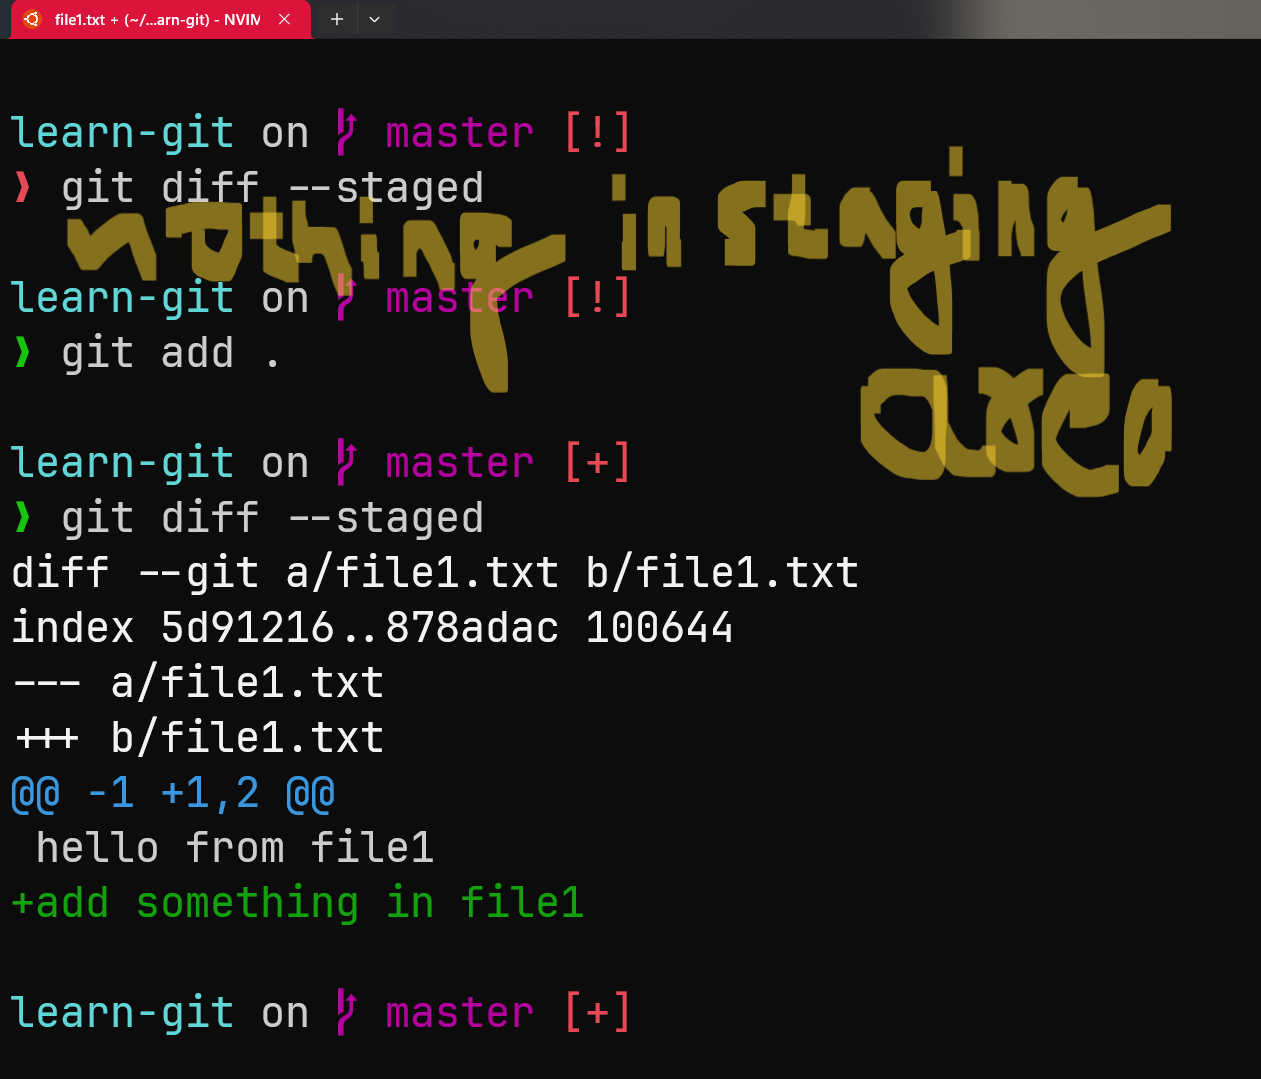
Shows the differences between the staged changes (the changes that are ready to be committed) and the last commit. This command helps you review what changes are currently staged for the next commit.
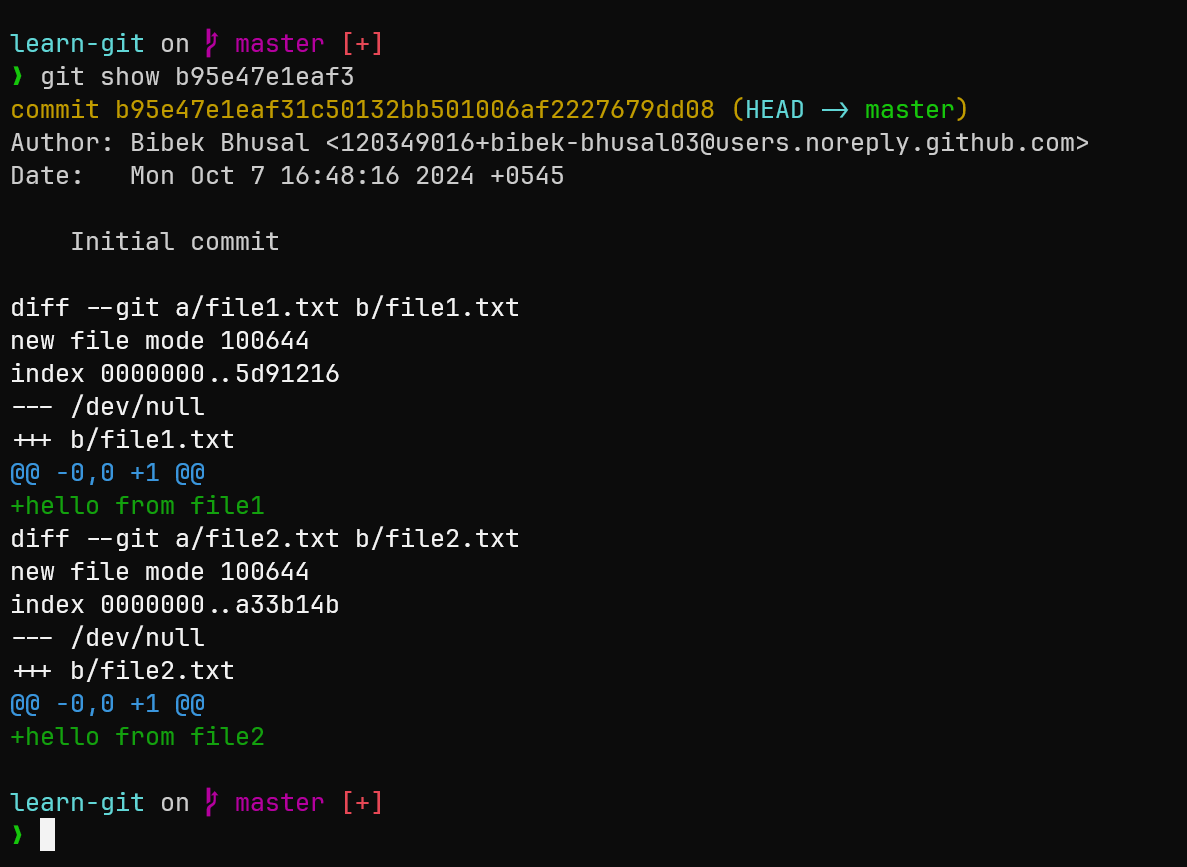
Show changes from a specific commit:
git show HEAD~1
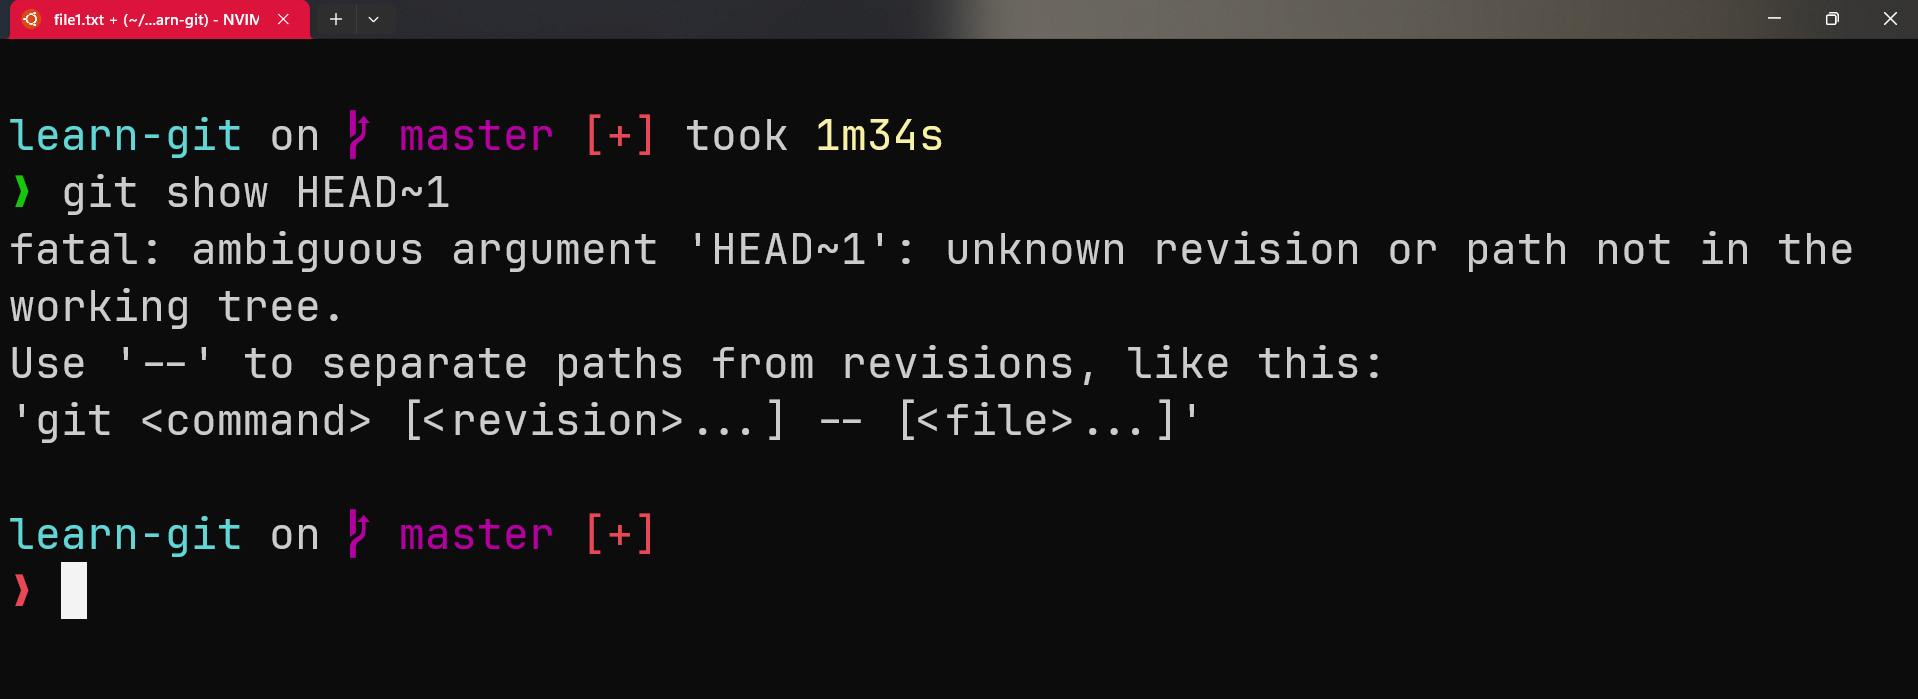
Here it shows nothing because:
HEAD is a pointer that points to the commit you currently are in.
And ~1 indicates “one commit before HEAD.”So HEAD~1 points to the commit that was the last before the current commit.
Note: Use HEAD~n to go back n commits.
We have a single commit currently in our repository hence, the commit before the current commit doesn’t exists.
So, you can also use the hash of a commit instead of HEAD~1 to show the information about commit git show b95e47e1eaf3
Restore changes: If you want to undo changes in the staging area:
git restore --staged file1.txt
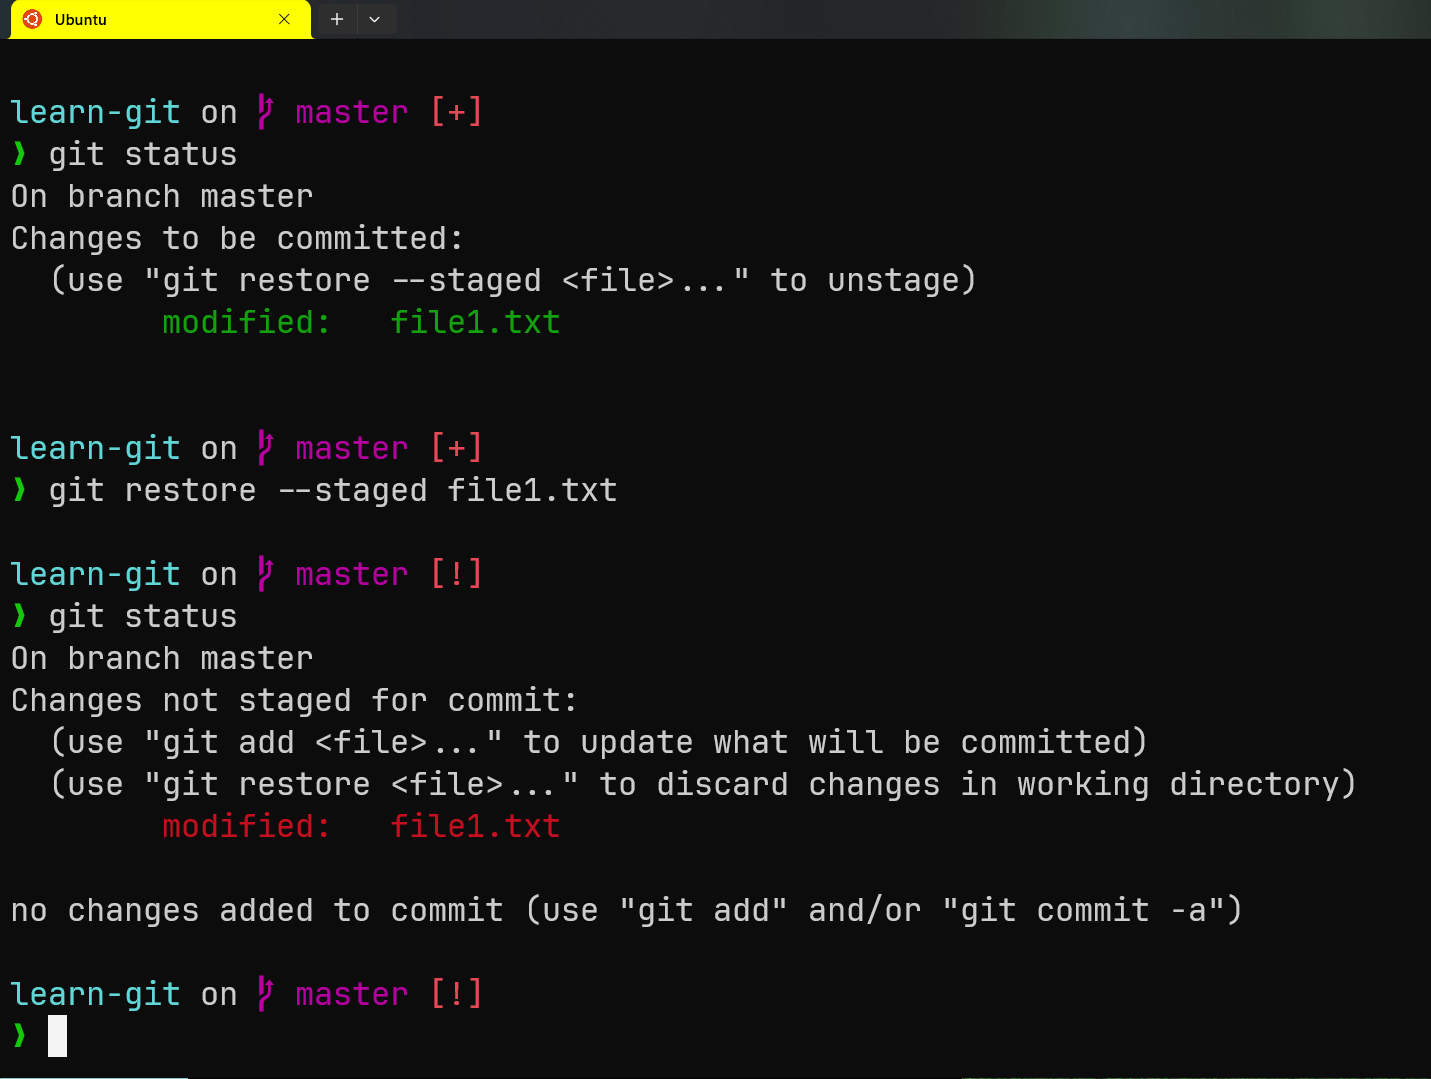
You can see how to restore, when using command git status. This command will be useful if you accidentally added something in the staging area using git add file...
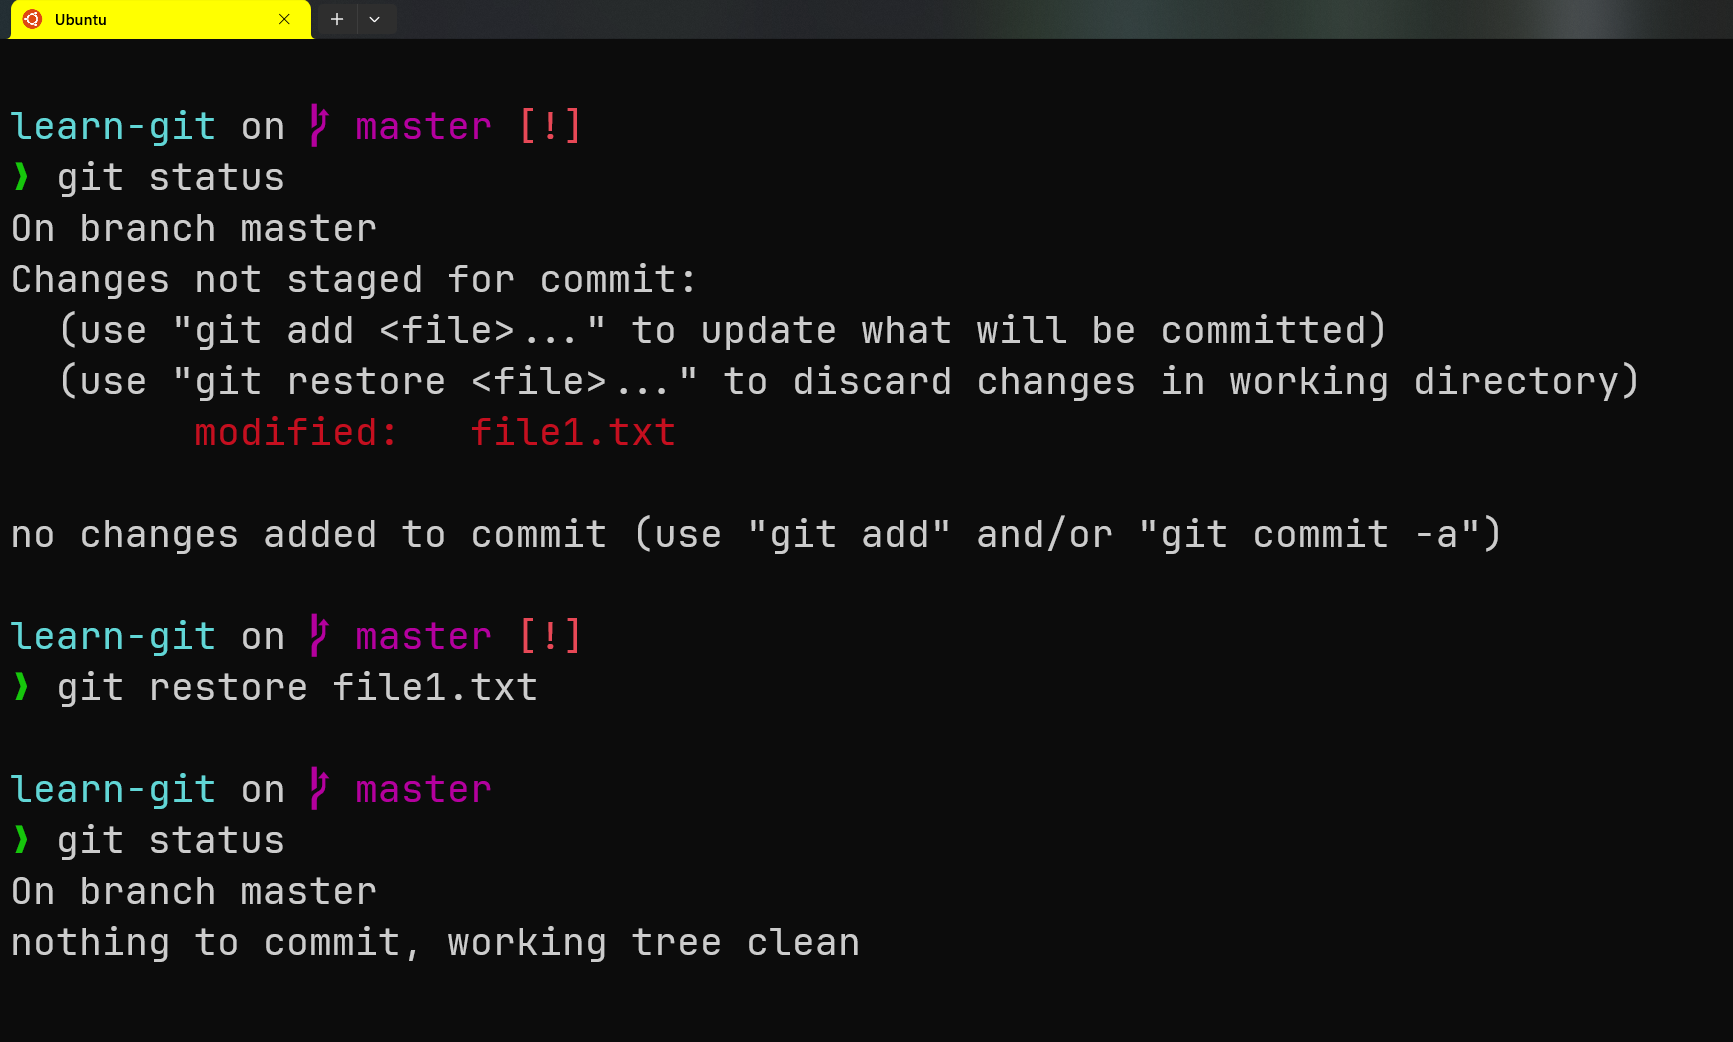
To undo local changes:
git restore file1.txt
The command git restore file1.txt is used to discard changes in the file file1.txt and restore it to the state it was in at the last commit.
Say you have made some changes in your file after commiting(like we have added in file1.txt) and you haven’t yet added them in staging area or commited. Now how do you remove the changes you made to the local file?? Here’s where you use this command.
By using previous command we removed our file1.txt from staging area but it still exists in our local file. Let’s remove it.
Note: Untracked files are not removed by restore(it means that files that are not yet tracked by Git (i.e., files that have never been added to the staging area with
git add) are unaffected by the git restore command.). To remove them we use(This will remove all untracked files.):
git clean -f
Reset your project to a previous state:
git reset <commit-id>
Say you accidently commited something and you want to undo it. We use this command to do so. You can also use HEAD~n instead of commit-id to go to previous commit(determined by n).
This will reset your project to the specified commit(change the state of your project to what it was when you commited the commit commit-id)
Now let’s reset our repository to before we accidently commited just now.
Conclusion:
Git is a powerful tool that allows you to track and manage the different versions of your project, making collaboration and project management easier.
In this blog, we’ve covered the basics you’ll use every day. As you grow more comfortable with Git, you’ll discover its advanced features, but mastering the essentials is a great first step.
And we use Github to store our project with git repository. I’ll be creating separate blog for that. So stay tuned for that.
If you still have confusion regarding Git then I also have a video explaining it. Git Tutorial for Beginners